GTM Coupe Teardown Starts
| Author |
Message |
|
apbellamy
GTM delivered
Joined: Wed Jan 16, 2013 6:21 pm
Posts: 33
Location: Rotherham, South Yorkshire
|
 Re: GTM Coupe Teardown Starts Good progress so far.
I recently painted a beige back seat with black vynil paint. It came out very well. Got it from ebay.
|
| Mon Jan 28, 2013 12:10 pm |
  |
 |
|
MiniMike
Part built GTM
Joined: Wed Sep 28, 2011 4:13 am
Posts: 143
Location: Victoria BC Canada
GTM: Cox/Coupe
|
Re: GTM Coupe Teardown Starts More progress this weekend.. finished dealing with the rust on the sills and the inside floor area..including sealing the patches with a skim of short strand fiberglass filler to ensure its waterproof. Sanding and final finish before painting to be done later with the rest of the bodywork. 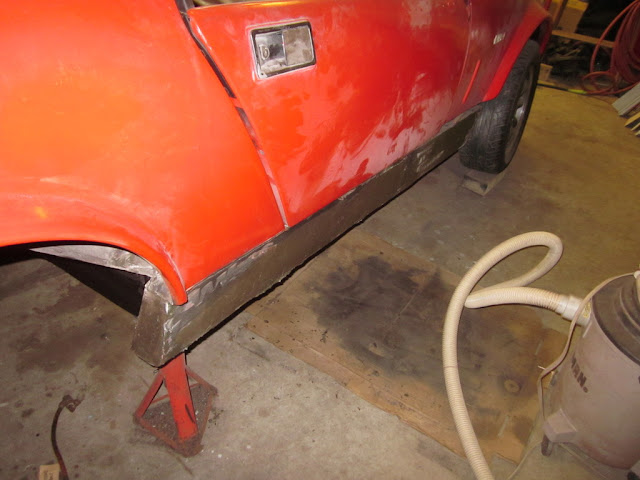 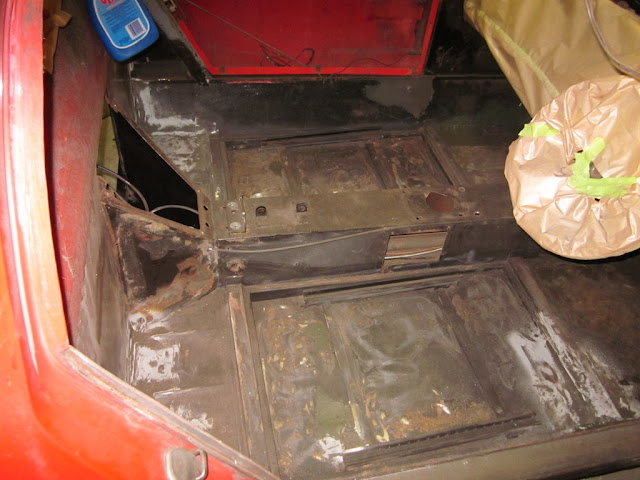 I also cleaned up and removed all the paint from the rear firewall and the engine frame, and gave it a first coat of paint.  I now need to deal with some areas on the bottom of the floor where some previous owner filled areas with silicone beads and painted over top. This should have been seam sealer, as the silicone does not really stick or seal the water out.. so I have stripped out the silicone and cleaned up the area. Boy is this a messy job, as I am lying on my back to get at these areas or sitting on the floor reaching in and under the car. I looked like I had just come out of coal mine by the time I was done! I will have to spend a little more time cleaning up the metal and then giving it a good coating with rust paint, followed by seam sealer, and another coat of paint. Then I should be able to move onto the body. You always find more than you expect once you start working on an area of the car. If I find something not quite right, I have to fix it, I can't just leave it alone..so everything tends to take more time than expected..  I'm having a friend make me a GTM badge out of aluminum on his milling machine. I will recess the front hood so it will sit flush when mounted to the front..this is of course a paper one to see how it looks.. 
_________________
MiniMike in Victoria
1989 GTM Coupe - SOLD
1989 Mini 30 VTEC powered
1966 Mini Van Honda ZC powered
|
| Mon Feb 04, 2013 1:09 am |
|
|
|
MiniMike
Part built GTM
Joined: Wed Sep 28, 2011 4:13 am
Posts: 143
Location: Victoria BC Canada
GTM: Cox/Coupe
|
Re: GTM Coupe Teardown Starts More word on the floor this week. Found a lot of silicone on the underside of the floor, which really does not work well to keep water out on metal to metal seams. Stripped all that off, wire brushed and ground the paint and rust off the floor, and sealed all the old floor patches and the new patches with short strand fiberglass, followed by two coats of Zero Rust, then some paintable seam sealer over all the seams. This was then given another coat of paint, and later I'll cover with undercoating. Inside the floor was also done the same way on all seams. Red zerorust on the floor..ready for sealing and painting again with black paint.... 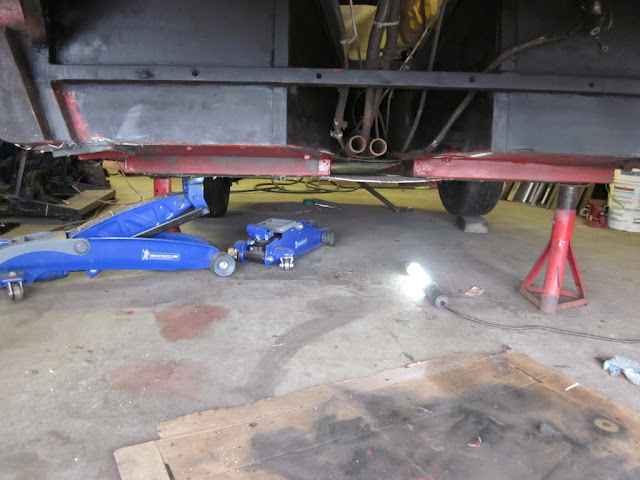 Finished Floor 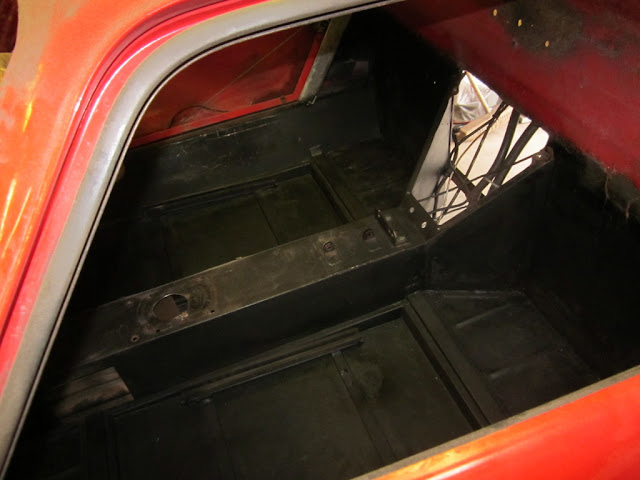 Getting ready to deal with the gap for the rear of the door/window frame. I have used door skins to space out an even gap from the window frame, and covered this in packing tape. 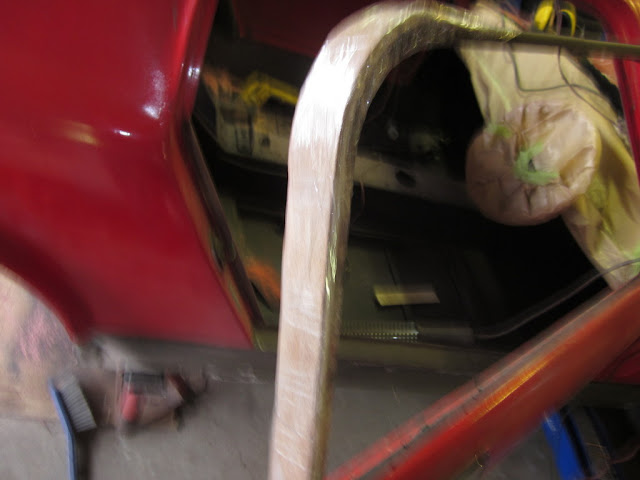 This gives me a space to fill in and end up with a nice fit for the door.  I have to grind off the flared out drip rail around the window frame, and will have to recreate it once the area is filled in.. 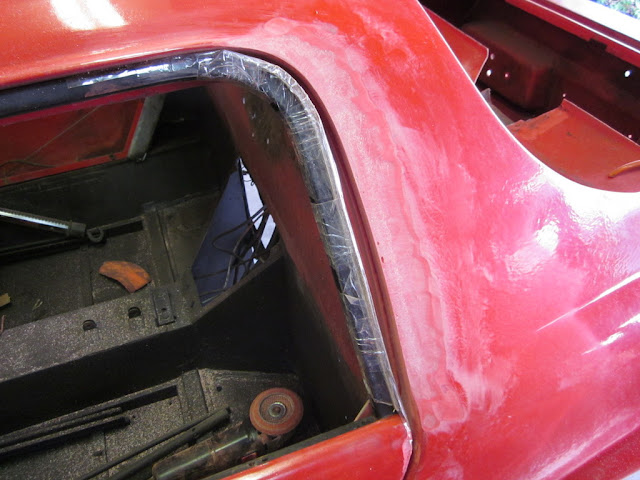 Also working on rear bumper, surplus holes and other areas on the body.. 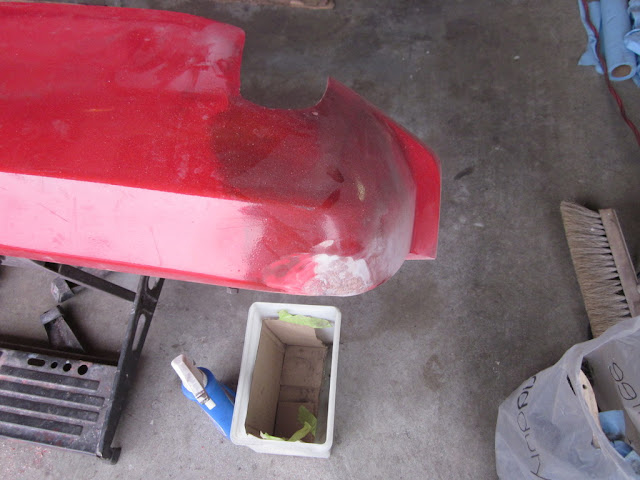    
_________________
MiniMike in Victoria
1989 GTM Coupe - SOLD
1989 Mini 30 VTEC powered
1966 Mini Van Honda ZC powered
|
| Tue Feb 12, 2013 5:07 am |
|
|
|
MiniMike
Part built GTM
Joined: Wed Sep 28, 2011 4:13 am
Posts: 143
Location: Victoria BC Canada
GTM: Cox/Coupe
|
Re: GTM Coupe Teardown Starts More work on the window frame gap.. area between the shim on the door frame and the body was filled with short strand fiberglass filler.. 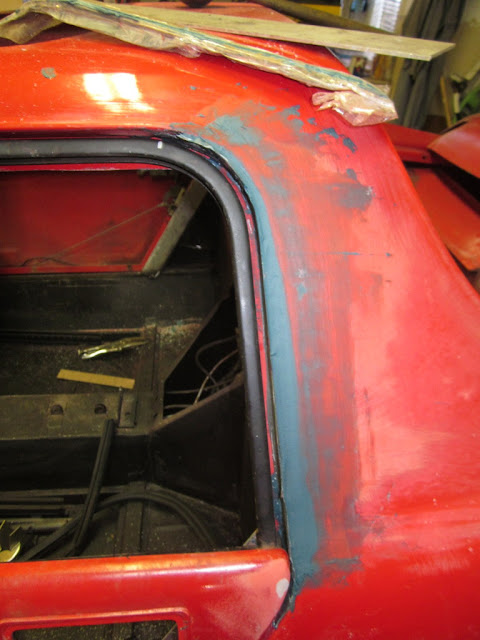 The the door was opened when the filler was partially set.. 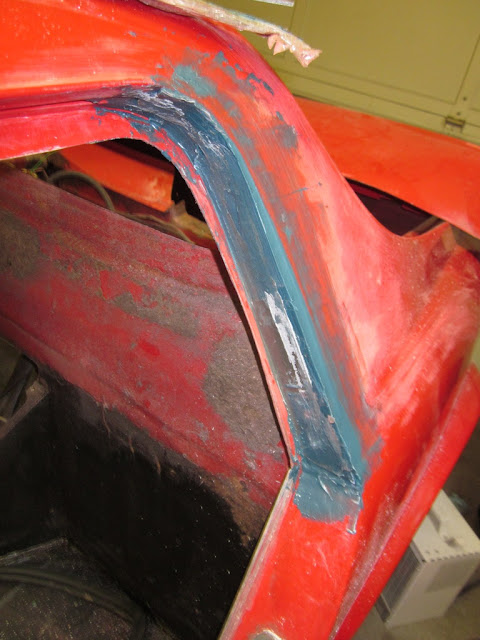 And the other side as well..  The the filler was shaped to a better fit and tapered into the rest of the body. When this was done, I applied a layer of fiber glass woven cloth over top for added strength.. 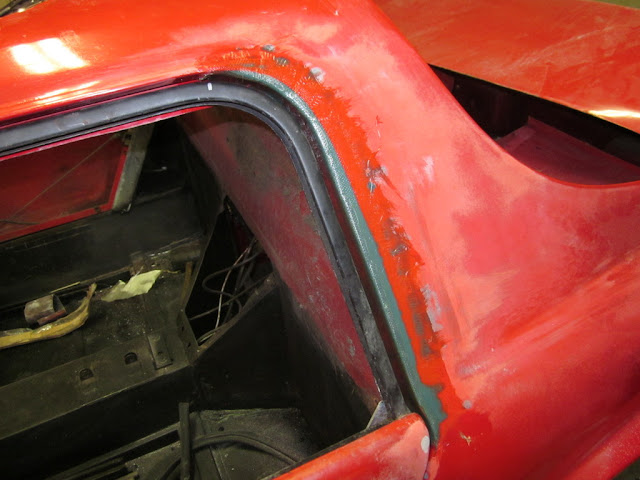  When this sets up I will have to build up the flange for holding the door seal, and also rebuild the drip rail around the perimeter of the body opening. I was thinking of just doing the drip rail on the top only and not doing it along the vertical? Any thoughts on that?
_________________
MiniMike in Victoria
1989 GTM Coupe - SOLD
1989 Mini 30 VTEC powered
1966 Mini Van Honda ZC powered
|
| Mon Feb 18, 2013 2:44 am |
|
|
|
MiniMike
Part built GTM
Joined: Wed Sep 28, 2011 4:13 am
Posts: 143
Location: Victoria BC Canada
GTM: Cox/Coupe
|
Re: GTM Coupe Teardown Starts I got my radiator back from the shop after having them do a re-core, put in a bleed point instead of the open pipe that was on the upper RH side, and put some mounting bolts for my electric SPAL fans.. Should be ready to drop in and wire up once I am at that stage..  Got the fuel door recess cut and fiber glassed today.. still some more work to clean up and round the edges and drill the mounting holes for the cover..  Also got a recess in the front center for the GTM Logo I am having made up on my friends CNC machine.. 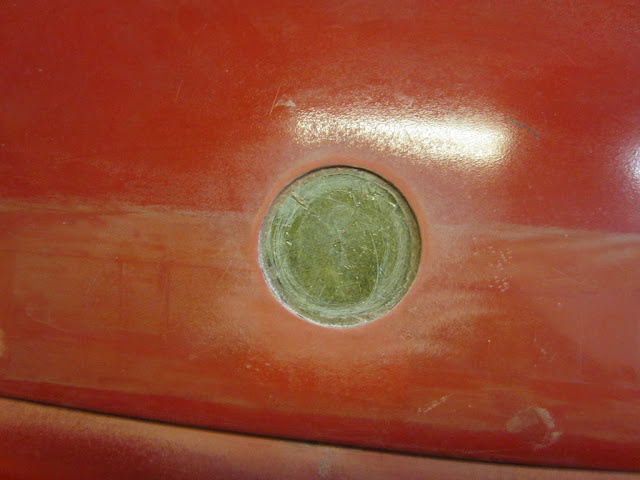 After the fiber glass cloth wrapping around the door pillar dried, I have given it a coat of the short strand fiber glass filler so I can reconstruct the lip that goes around the door frame.. just have to sand this to get the right shape.. 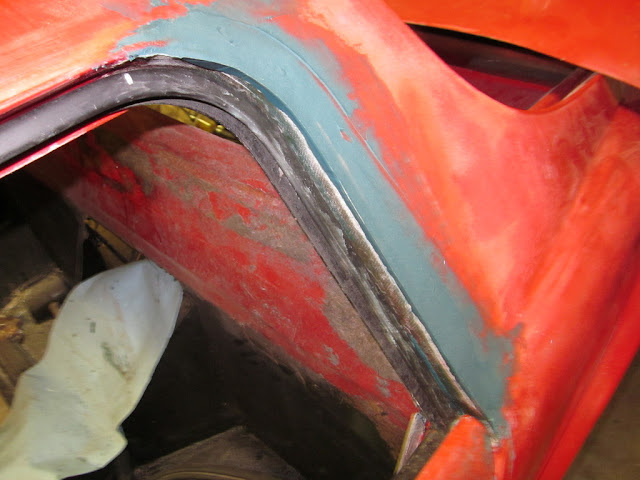 And also started to mold the box for the air filter, as currently someone just cut away part of the trunk/engine divider to make room for the air filter... This will get trimmed up and then glassed into place... 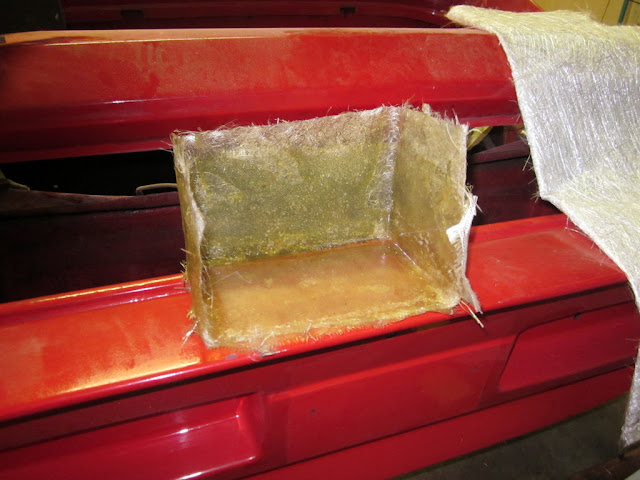 Fairly productive weekend.. and lots more sanding and bodywork still to go!
_________________
MiniMike in Victoria
1989 GTM Coupe - SOLD
1989 Mini 30 VTEC powered
1966 Mini Van Honda ZC powered
|
| Mon Feb 25, 2013 1:31 am |
|
|
|
MiniMike
Part built GTM
Joined: Wed Sep 28, 2011 4:13 am
Posts: 143
Location: Victoria BC Canada
GTM: Cox/Coupe
|
Re: GTM Coupe Teardown Starts I got the engine and sub-frame cleaned up and painted today, and new temp sensor, clutch slave and hose, engine mounts and intake/exhasut gasket installed. I also finished off the engine compartment, as I want to drop the engine back in to get the car on it's wheels so I can move it out side for the sanding to keep the garage less dusty.  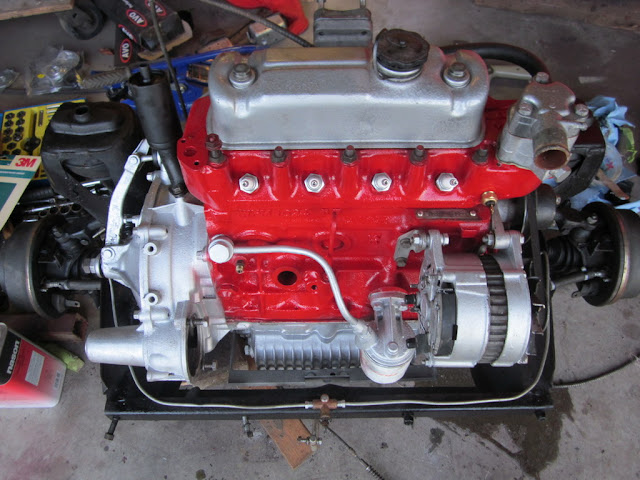 Finished the major work on the fuel door, just need to finish up the final filler and sanding , which I'll do with the rest of the car prep. 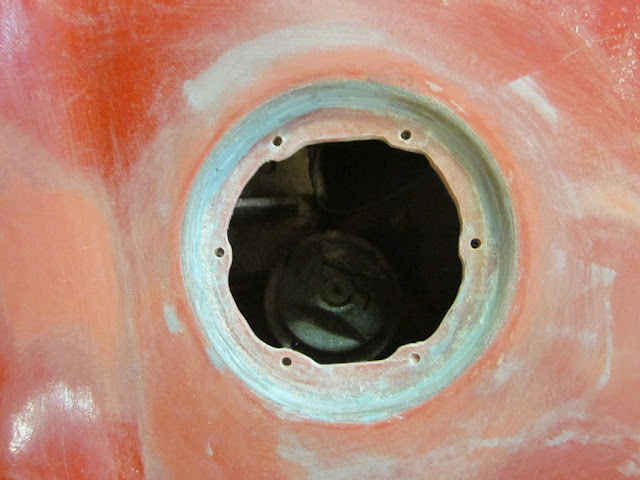  No more opening the front end to fuel up! 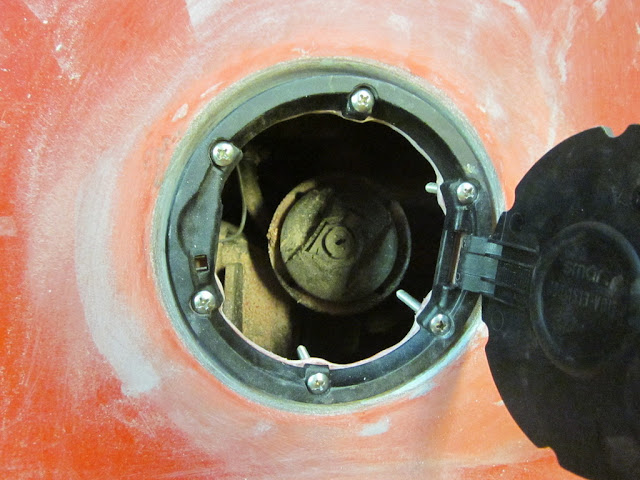 It's hard to see in the pictures, but I also have finished adding back the contour around the door frames.. I chose to match the taper at the top of the door, but trail it off to nothing by the bottom of the window frame. Again this needs final filler and prep. 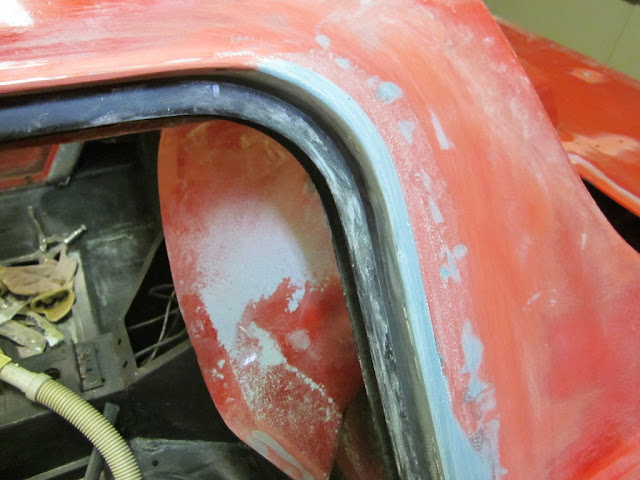 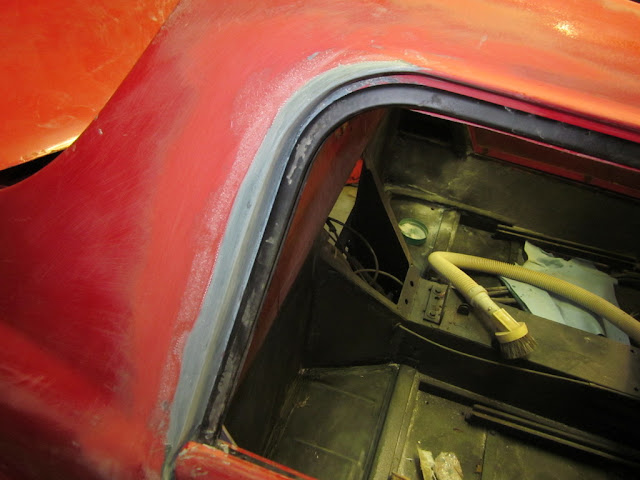 A shot of the whole car! 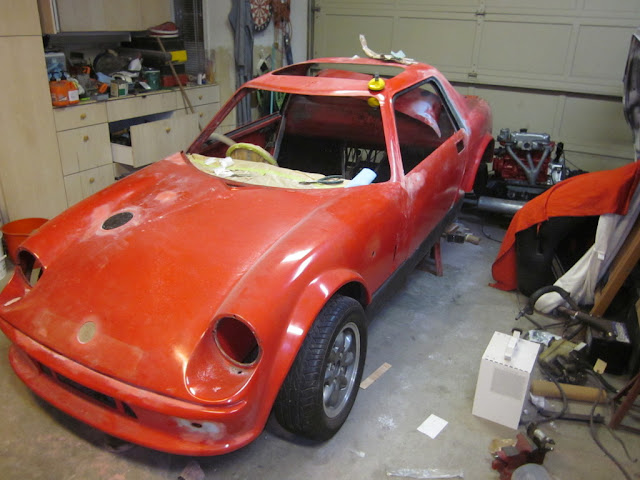 and starting work on the air filter box ..  This is the same color I am painting the car.. so took a closeup of the engine block to show the color... 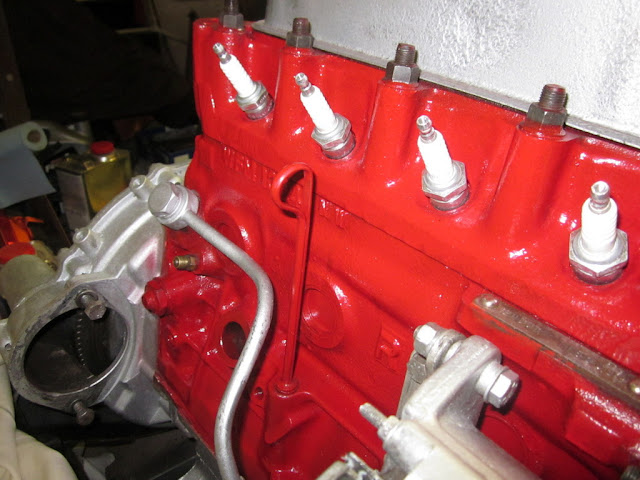
_________________
MiniMike in Victoria
1989 GTM Coupe - SOLD
1989 Mini 30 VTEC powered
1966 Mini Van Honda ZC powered
Last edited by MiniMike on Wed Mar 06, 2013 2:55 am, edited 1 time in total.
|
| Mon Mar 04, 2013 5:27 am |
|
|
|
turbocox
Where is my Number Plate?
Joined: Mon Oct 01, 2007 7:25 pm
Posts: 974
Location: Near Milton Keynes
GTM: Cox/Coupe
|
Re: GTM Coupe Teardown Starts
_________________
THE WORLD'S FASTEST 'A' SERIES COX GTM Standing 1/4 Mile in....13.502 @115mph MITP 08
|
| Tue Mar 05, 2013 9:27 pm |
|
|
|
Sven
Ready for SVA
Joined: Sat May 05, 2012 9:24 am
Posts: 373
Location: Norwich
GTM: Libra
|
Re: GTM Coupe Teardown Starts  following this with interest. Keep the photo's & story coming. Can't wait to see it when its finished. (is a kit ever finished?)
_________________
Previous Coupe owner (1987-94)
Previous Libra owner (2012-19)
|
| Tue Mar 05, 2013 10:31 pm |
|
|
|
MiniMike
Part built GTM
Joined: Wed Sep 28, 2011 4:13 am
Posts: 143
Location: Victoria BC Canada
GTM: Cox/Coupe
|
Re: GTM Coupe Teardown Starts Thanks guys.. hope to finish in the next three months or so.. How does the rear boot seal from the weather, as the divider between boot and engine compartment is not high enough to seal against the boot lid.. has this been cut down on my car or are they all the same.. I am thinking of extending the lip up to meet the boot lip and capping it off with a rubber seal.. anyone done something like this?
_________________
MiniMike in Victoria
1989 GTM Coupe - SOLD
1989 Mini 30 VTEC powered
1966 Mini Van Honda ZC powered
|
| Tue Mar 05, 2013 10:35 pm |
|
|
|
Sven
Ready for SVA
Joined: Sat May 05, 2012 9:24 am
Posts: 373
Location: Norwich
GTM: Libra
|
Re: GTM Coupe Teardown Starts From what i know & remember of mine (20 years ago), they are all like that. But i don't recall ever getting any water in the boot. https://www.dropbox.com/s/kzdso89gd6eou9s/GTM%205.tifhttps://www.dropbox.com/s/m1w04ym3alyj7nc/GTM%2019.tif
_________________
Previous Coupe owner (1987-94)
Previous Libra owner (2012-19)
|
| Tue Mar 05, 2013 11:09 pm |
|
|
|
MiniMike
Part built GTM
Joined: Wed Sep 28, 2011 4:13 am
Posts: 143
Location: Victoria BC Canada
GTM: Cox/Coupe
|
Re: GTM Coupe Teardown Starts Looks a lot better in the second picture! But it is about the same height as my divider..
_________________
MiniMike in Victoria
1989 GTM Coupe - SOLD
1989 Mini 30 VTEC powered
1966 Mini Van Honda ZC powered
|
| Wed Mar 06, 2013 2:46 am |
|
|
|
MiniMike
Part built GTM
Joined: Wed Sep 28, 2011 4:13 am
Posts: 143
Location: Victoria BC Canada
GTM: Cox/Coupe
|
Re: GTM Coupe Teardown Starts Some more work this week.. finished off the rear car box and raised the boot separator flange up higher so I can use a rubber seal along the edge to the boot lid.. I also got the car back on wheels so I can now roll it out of the garage to do the rest of the sanding, as the weather is getting warm enough to work outside. The boot separator built up, but not trimmed off yet... 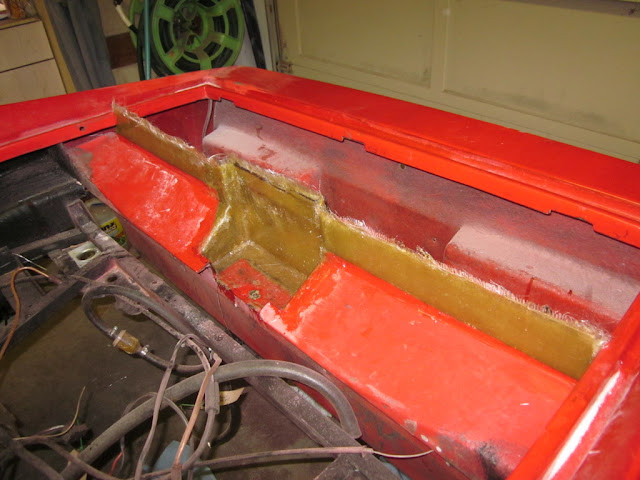 The engine back at home... plenty of room for air cleaner and to get carb off and on the car... 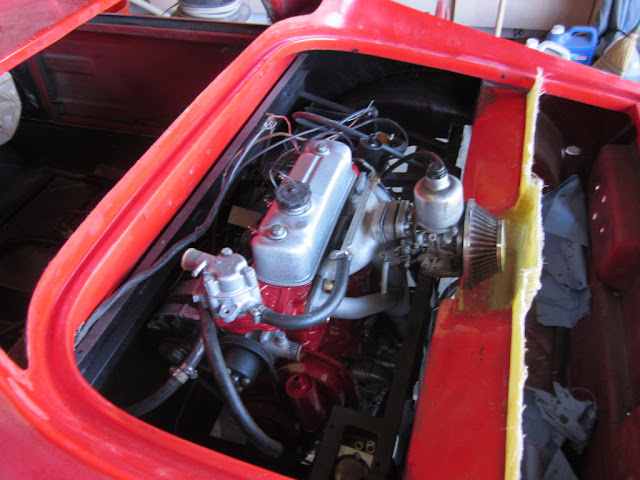 My new shocks installed... I have a set for the front as well.. 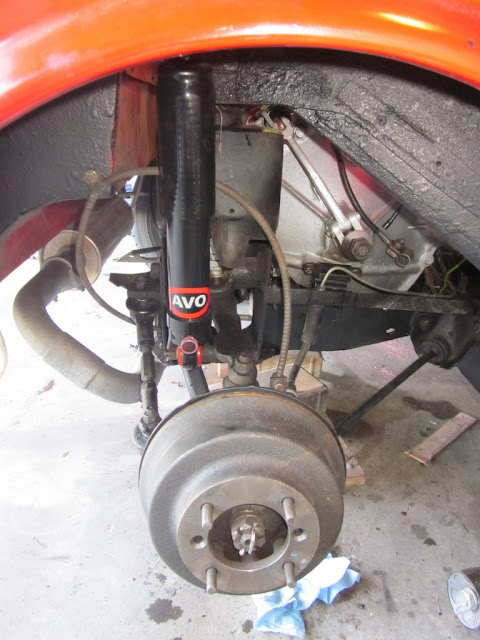 First time on all 4 wheels in a long time...  The edge all trimmed up and rubber seal on part of the flange.. need to buy enough to do the entire lip.. 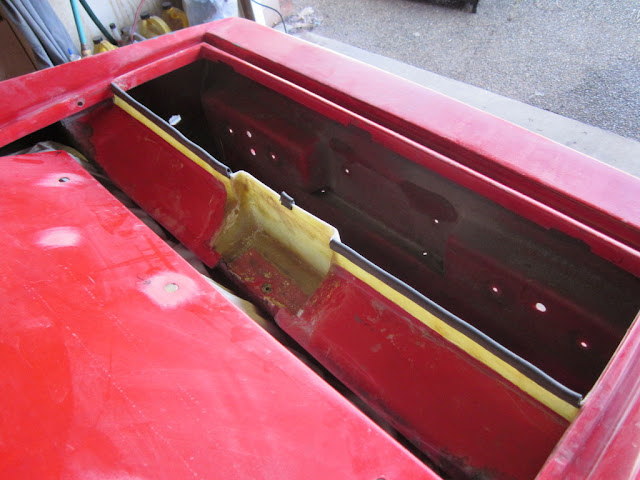 Picture of the seal from under the boot lid...  I made a new rear window as well, cut out of lexan, then built a form out of sheet steel, laid the lexan over top and heated up until it drooped onto the shaped form.. It starts to drop form in the area of 140-155 degrees Celsius. The window should be a lot easier to see out as the old one was getting clouded and starring.. 
_________________
MiniMike in Victoria
1989 GTM Coupe - SOLD
1989 Mini 30 VTEC powered
1966 Mini Van Honda ZC powered
|
| Sun Mar 10, 2013 11:45 pm |
|
|
|
RaymondH
On the Road
Joined: Tue Jun 17, 2008 9:11 pm
Posts: 604
|
Re: GTM Coupe Teardown Starts It's getting there Mike Do you ever stop to eat or sleep??? 
_________________
Education is important.
Cars are importanter.
|
| Mon Mar 11, 2013 9:40 pm |
|
|
|
MiniMike
Part built GTM
Joined: Wed Sep 28, 2011 4:13 am
Posts: 143
Location: Victoria BC Canada
GTM: Cox/Coupe
|
Re: GTM Coupe Teardown Starts Sven wrote: :D following this with interest. Keep the photo's & story coming. Can't wait to see it when its finished. (is a kit ever finished?) I'm starting to think it will never be finished! Just as I finish one thing, I think of the next 100 things to do! and of course adding new ones as well..
_________________
MiniMike in Victoria
1989 GTM Coupe - SOLD
1989 Mini 30 VTEC powered
1966 Mini Van Honda ZC powered
|
| Tue Mar 12, 2013 12:33 am |
|
|
|
mayoturbo
Part built GTM
Joined: Sat Apr 21, 2012 2:19 pm
Posts: 52
|
Re: GTM Coupe Teardown Starts I like the idea of raising the boot separator, should have been like it in the first place really. Keep up the good work
|
| Wed Mar 13, 2013 10:10 am |
|
|